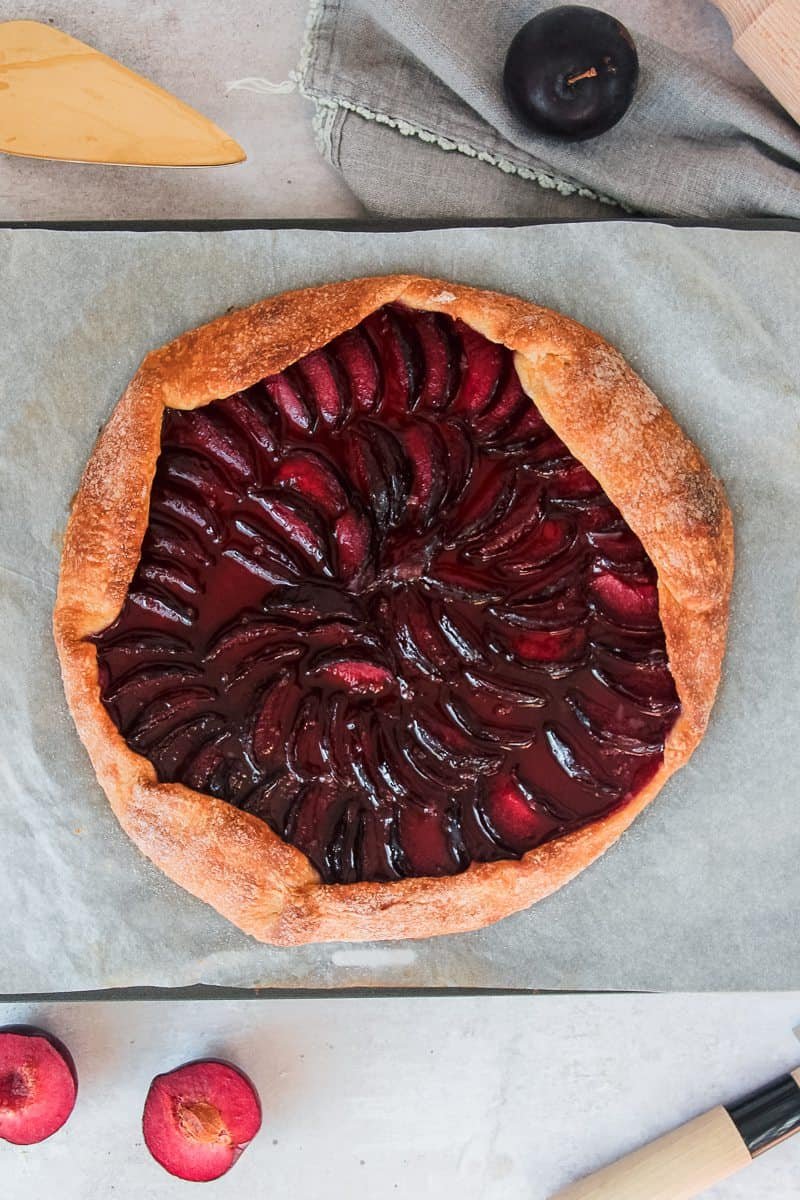
Plums are one of those oft overlooked summer fruits that is actually a very popular fruit in many European dishes and whilst I don’t love snacking on them as other seasonal delights (hello lovely nectarines and peaches), but plums used like in this plum galette show how little they need to be the star of a dish.
One of the best things about galettes is how relatable they are, so imperfectly imperfect and such an easy dish to make for casual events or dinner parties alike because it does require just a little effort which people always appreciate.
How to prepare Plum Galette
- Baking tray + oven: Place the baking tray in the oven to heat up as you prepare your galette.
- Prepare the pastry: Ensure your buttermilk and butter is as chilled as possible before adding to your dry ingredients.
- Dough it: Form your dough and begin rolling out until ¼ inch thick and no larger than your greaseproof paper.
- Place onto the greaseproof paper: Slide the pastry onto your greaseproof paper.
- Jammy: Smear the jam onto the pastry.
- Lay the plums down: Lay your plums out evenly around your galette (or toss em over, you do you!).
- Fold and pinch: Beginning at one corner, fold a section of the edge over the plums and pinch together and continue until the pastry edges have been pinched shut.
- Slide: Slide your galette onto your hot baking tray.
- Bake: Bake until golden and bubbly.
- Cool: Remove and allow to cool.
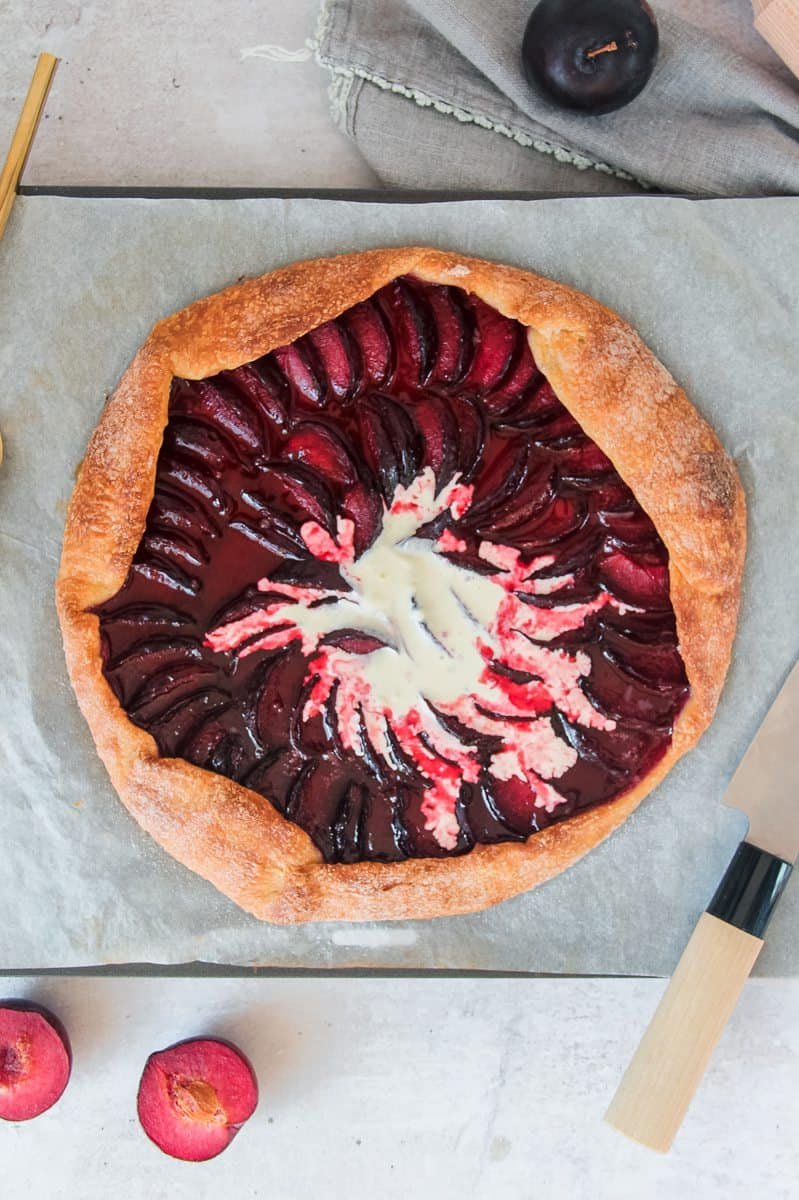
- Serve: Slice and serve with some ice cream, pouring cream or better yet, for breakfast with Greek yogurt! Dig in!
Tips for the best Plum Galette
Pastry used here: The pastry used was a half portion of this recipe which I had remaining after making pie, if you prefer you could make the entire pastry and this freezes well when covered full for 3 months and then make two galettes or use as a single crust pie base.
Pastry option: If you can’t be bothered to make your pastry, that is totally fine, especially because galette should be unfussy and rustic so a store bought shortcrust pastry would work well here.
Placing your baking tray in the oven: By heating up your baking try you will help the galette base bake consistently as this rustic pie usually has a thicker crust than a traditionally baked one in a dish so needs a hot surface to get it right. Alternatively you could ensure a pizza stone is set in the oven and heating up (if you have one) which will transmit heat without the stress of transferring the unbaked galette onto a hot tray.
Slicing the plums: The easiest way to get consistent slices with the plums is to halve them evenly and lay cut side down, slicing from one end of the half thinly and then repeating from the opposite side when you reach what was the center of the half equaling 6-7 slices per half.
More stone fruit recipes you'll enjoy
Upside Down Plum Passionfruit Cake
Peach Crumble
How to make:
Line a baking tray with greaseproof paper and preheat your oven to 200C/390F.
Place the paper aside for the pastry to slide onto and set the baking tray in the oven to heat up (see note)
To make the dough, sift the flour, baking powder and salt into a bowl, adding your sugar and stirring through to combine.
Rub in the butter until the mixture resembles breadcrumbs and make a well in the center.
Beat the egg and buttermilk in a small bowl until well combined and pour into the dry mixture.
Carefully stir together until a dough has formed, and turn onto place on a lightly floured surface.

Lift the pastry onto your greaseproof paper.
Smear the plum jam over the base of your pastry with an offset spatula or the back of a spoon, allowing a 1 ½ inch gap at the edges.

Lay your sliced plums down on top of the jam around the galette, working from the outside inwards, using the thicker and larger slices on the section closest to the edge of your pastry.

To form the galette, fold one edge of the pastry over the outer plums and pinch the edge shut, continue with the remaining outer edges until it is fully formed.
Remove the hot tray from the oven and slide the plum galette onto it.
Place in the oven and bake for 50 minutes or until golden and bubbly.
Remove and allow to cool.
Slice and serve with scoops of ice cream or even serve as breakfast alongside some thick Greek yogurt.
Enjoy!

Plum Galette
- Prep Time: 25 minutes
- Cook Time: 50 minutes
- Total Time: 1 hour 15 minutes
- Yield: Serves 8
- Category: Pies & Tarts
Description
A galette is the least fussy type of pie and this one takes plum jam and fresh seasonal plums and turns them into an easy galette that can be made with homemade or store bought pastry.
Ingredients
Pastry
214 grams / 1 ⅓ cups plain flour
2 grams / ½ teaspoon baking powder
¼ teaspoon sea or kosher salt
50 grams / ¼ cup superfine/caster sugar
35 grams / 2 ½ tablespoons butter, cold and cubed
1 small egg
85 milliliters / ⅓ cup buttermilk
Plum Filling
6 plums, pitted and finely sliced (see note)
2 tablespoons plum jam
40 grams / 3 tablespoons superfine / caster sugar
Instructions
- Line a baking tray with greaseproof paper and preheat your oven to 200C/390F.
- Place the paper aside for the pastry to slide onto and set the baking tray in the oven to heat up (see note)
- To make the dough, sift the flour, baking powder and salt into a bowl, adding your sugar and stirring through to combine.
- Rub in the butter until the mixture resembles breadcrumbs and make a well in the center.
- Beat the egg and buttermilk in a small bowl until well combined and pour into the dry mixture.
- Carefully stir together until a dough has formed, and turn onto place on a lightly floured surface.
- Roll out until it is approximately no larger than your greaseproof paper and ¼ inch thickness, adding a teaspoon of flour to your working surface, as needed to ensure it doesn’t stick.
- Lift the pastry onto your greaseproof paper.
- Smear the plum jam over the base of your pastry with an offset spatula or the back of a spoon, allowing a 1 ½ inch gap at the edges.
- Lay your sliced plums down on top of the jam around the galette, working from the outside inwards, using the thicker and larger slices on the section closest to the edge of your pastry.
- Sprinkle the sugar over the plums nice and evenly.
- To form the galette, fold one edge of the pastry over the outer plums and pinch the edge shut, continue with the remaining outer edges until it is fully formed.
- Remove the hot tray from the oven and slide the plum galette onto it.
- Place in the oven and bake for 50 minutes or until golden and bubbly.
- Remove and allow to cool.
- Slice and serve with scoops of ice cream or even serve as breakfast alongside some thick Greek yogurt.
- Enjoy!
Notes
Pastry used here: The pastry used was a half portion of this recipe which I had remaining after making pie, if you prefer you could make the entire pastry and this freezes well when covered full for 3 months and then make two galettes or use as a single crust pie base.
Pastry option: If you can’t be bothered to make your pastry, that is totally fine, especially because galette should be unfussy and rustic so a store bought shortcrust pastry would work well here.
Placing your baking tray in the oven: By heating up your baking try you will help the galette base bake consistently as this rustic pie usually has a thicker crust than a traditionally baked one in a dish so needs a hot surface to get it right. Alternatively you could ensure a pizza stone is set in the oven and heating up (if you have one) which will transmit heat without the stress of transferring the unbaked galette onto a hot tray.
Slicing the plums: The easiest way to get consistent slices with the plums is to halve them evenly and lay cut side down, slicing from one end of the half thinly and then repeating from the opposite side when you reach what was the center of the half equaling 6-7 slices per half.
Recipe by Roamingtaste
Nutrition
- Calories: 217 calories per serve


Leave a Reply