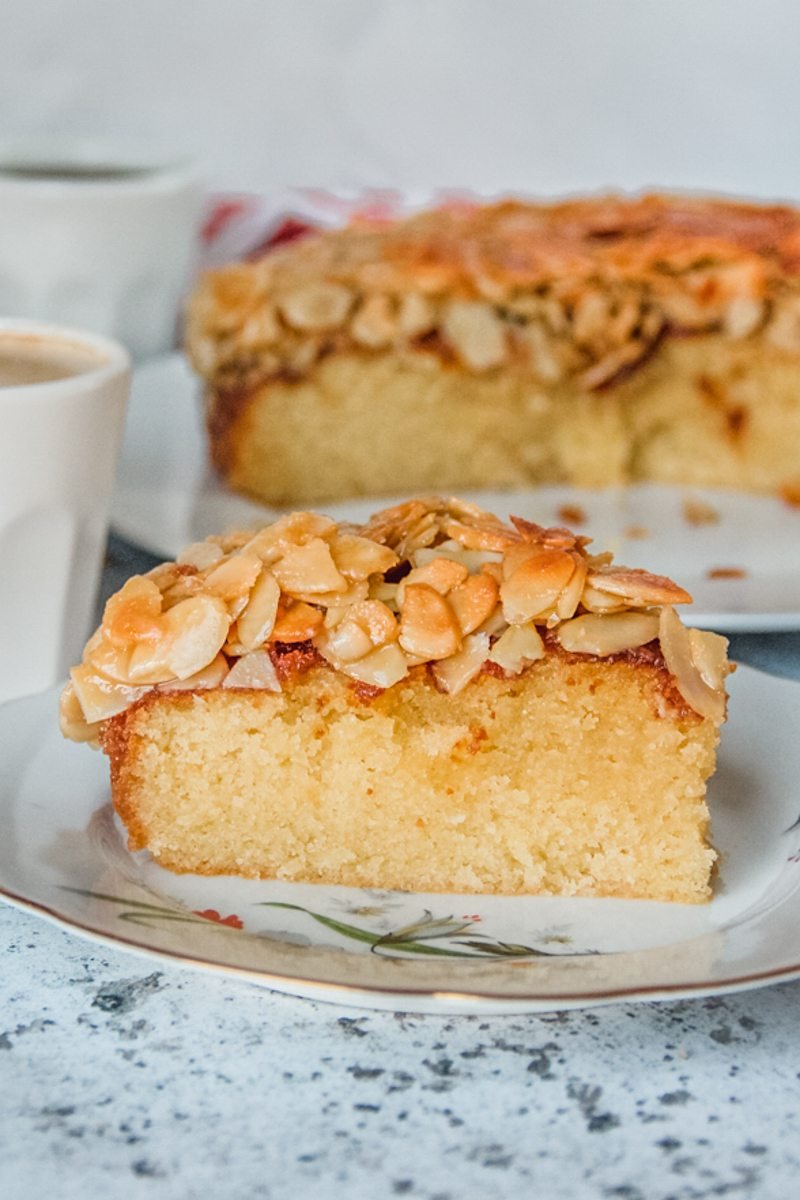
Drommekage - Danish Dream Cake features a sponge style cake topped with a caramelized coconut crust for a beloved slice of Denmark that is both perfect for special occasions or every day.
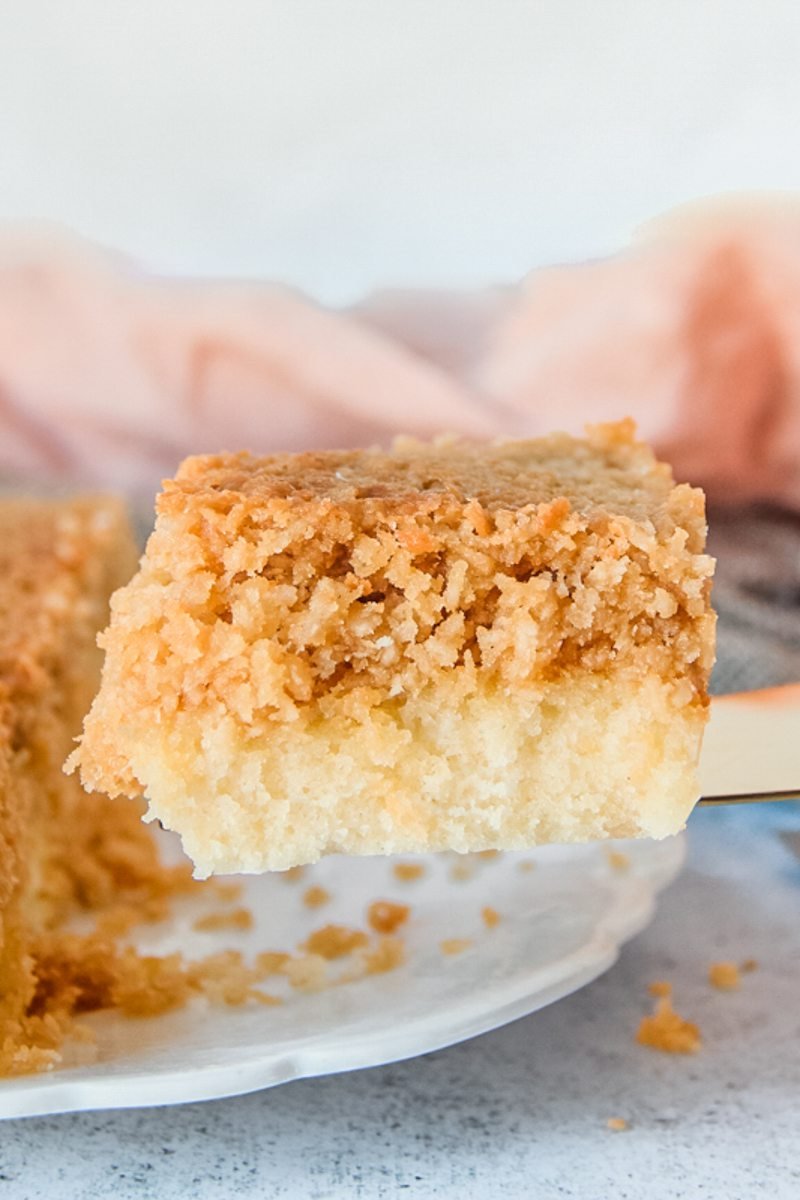
Table of Contents
Dream Cake History
It seems the origins of this cake stem back to the mid twentieth century, though the original was made slightly differently than how you'll see it made here and it looks like a grandmother's recipe was taken from a baking competition and made thereafter by a bakery company.
Despite it's less than dreamy background (stolen and distributed as if the bakery company had come up with this recipe) the upside is the fact this is now a well known recipe throughout Denmark and it seems, a very popular recipe!

Ingredients and substitutions for Dream Cake
- Plain flour: Plain flour or all purpose is best to give the cake it’s light texture and nice crumb. You also don’t want to overwork the batter so you don’t end up with a firm cake texture.
- Butter: Unsalted or salted butter works great here. Room temperature is essential to create a nice fluffy foundation and is essential to our nice frosting.
- Sugar: Superfine or caster sugar dissolves into our cake and add sweetness without additional flavors to the cake. The brown sugar is best for our caramel topping.
- Eggs: The eggs add structure and bind everything together and are the core to our cake.
- Desiccated coconut: Desiccated coconut is finer and adds a nice texture. You could substitute with shredded coconut, if you prefer.
- Baking powder: This helps our cake rise so to create the nice light crumb and avoid a dense cake. Baking powder can expire, so it's best to check the best before date, particularly if yours has been open for some time.
- Eggs: Room temperature eggs are essential to bind with the butter and sugar, allowing more air to be introduced. This results in our sponge that nice and light texture.
- Milk: Whole milk was used helping add moisture to the cake and topping. You could substitute with creamy non dairy milk. The weight of the milk in the cake weighs 124 grams and 61 grams for the topping.
See recipe card for quantities.
How to make Dream Cake:
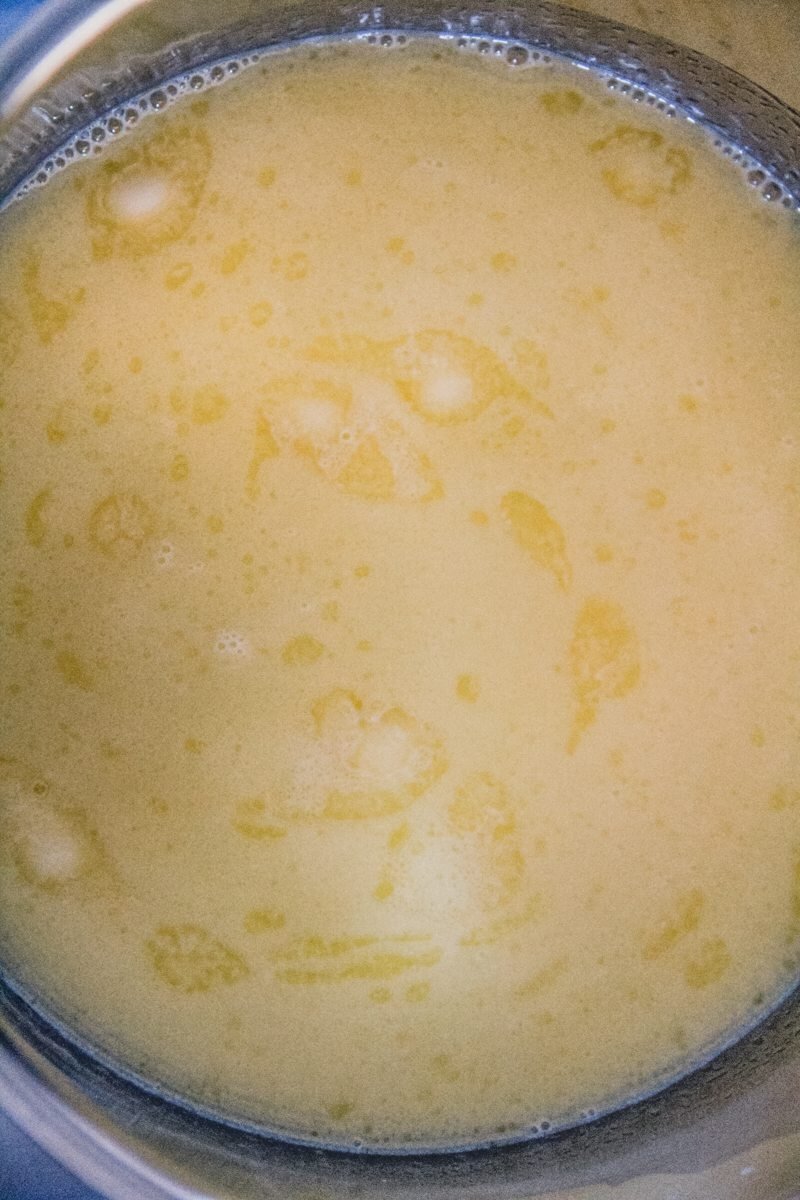
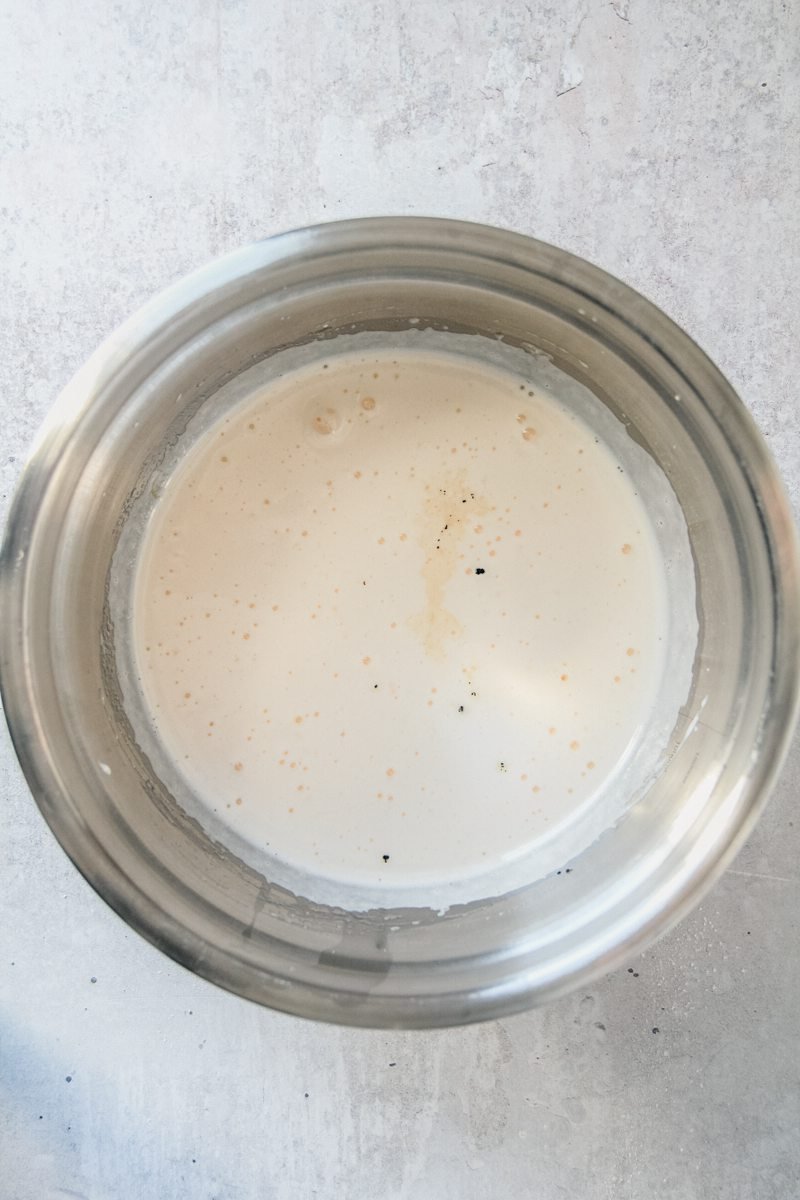
Step 1: Butter and milk: Heat in a saucepan until the butter is melted and the milk is warm.
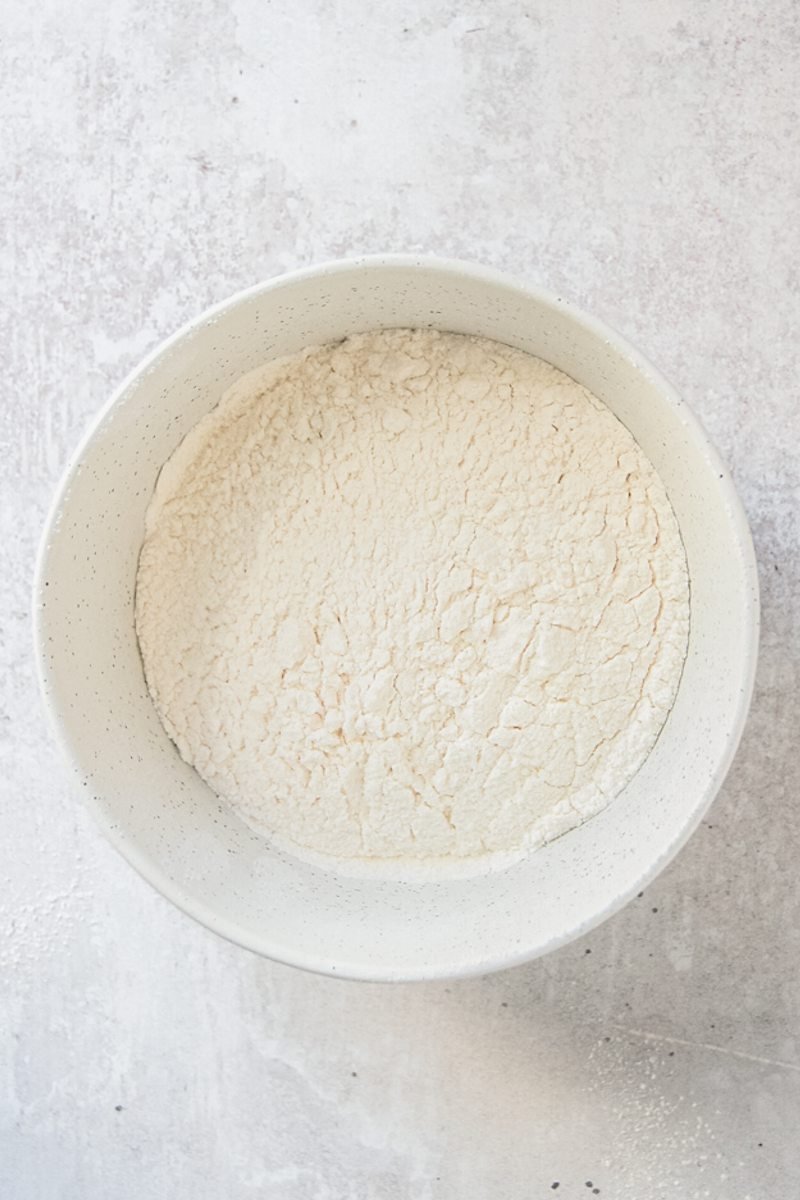
Step 2: Sift: Sift the flour and baking powder into a bowl.
Step 3: Beat your sugar and eggs: Beat your sugar and eggs for several minutes until the eggs have doubled in volume and the sugar has dissolved.
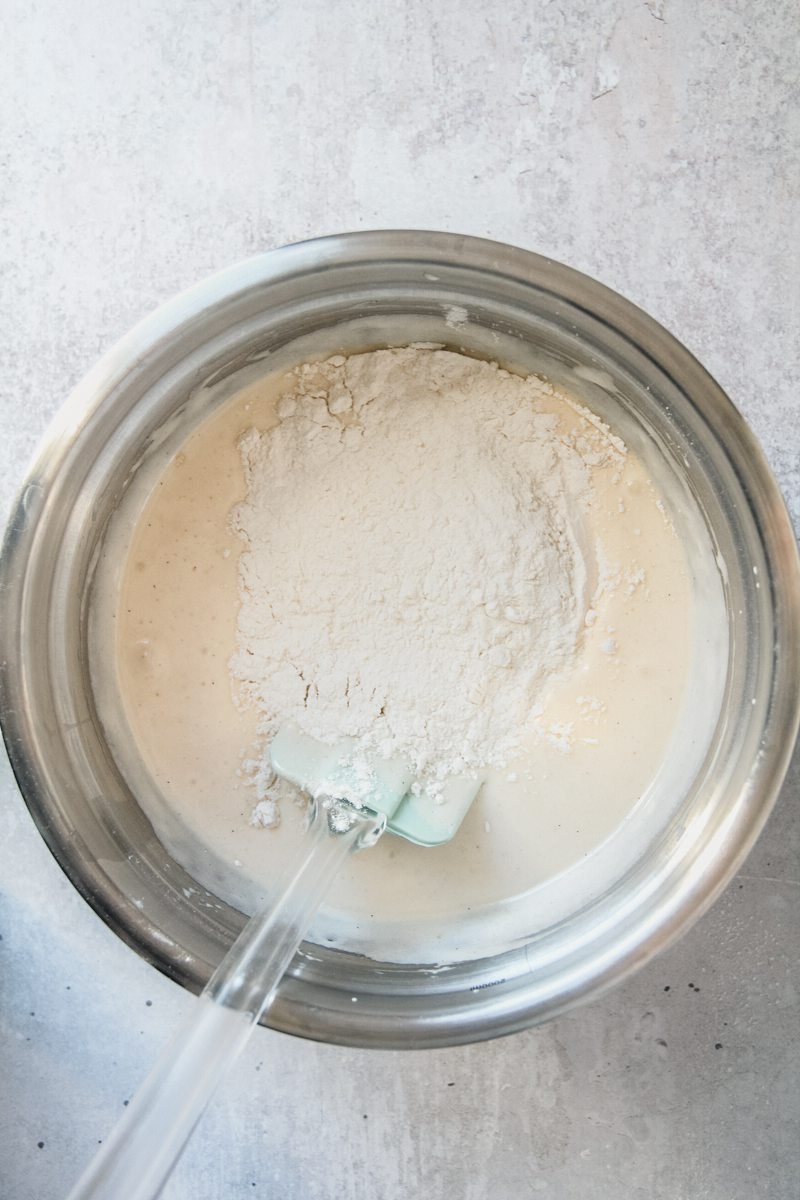
Step 4: Fold: Add half the flour and fold until smooth.
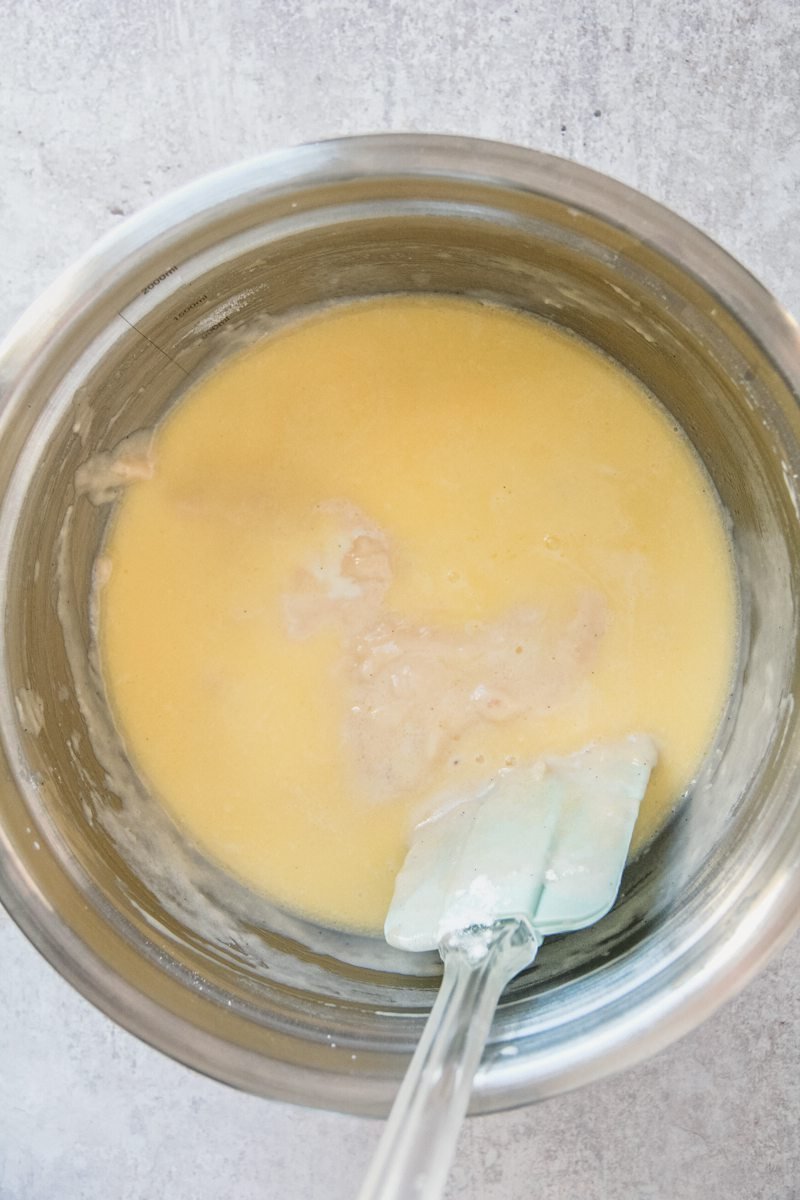
Step 5: Fold: Slowly and carefully fold half the milk and butter, until smooth. Repeat.

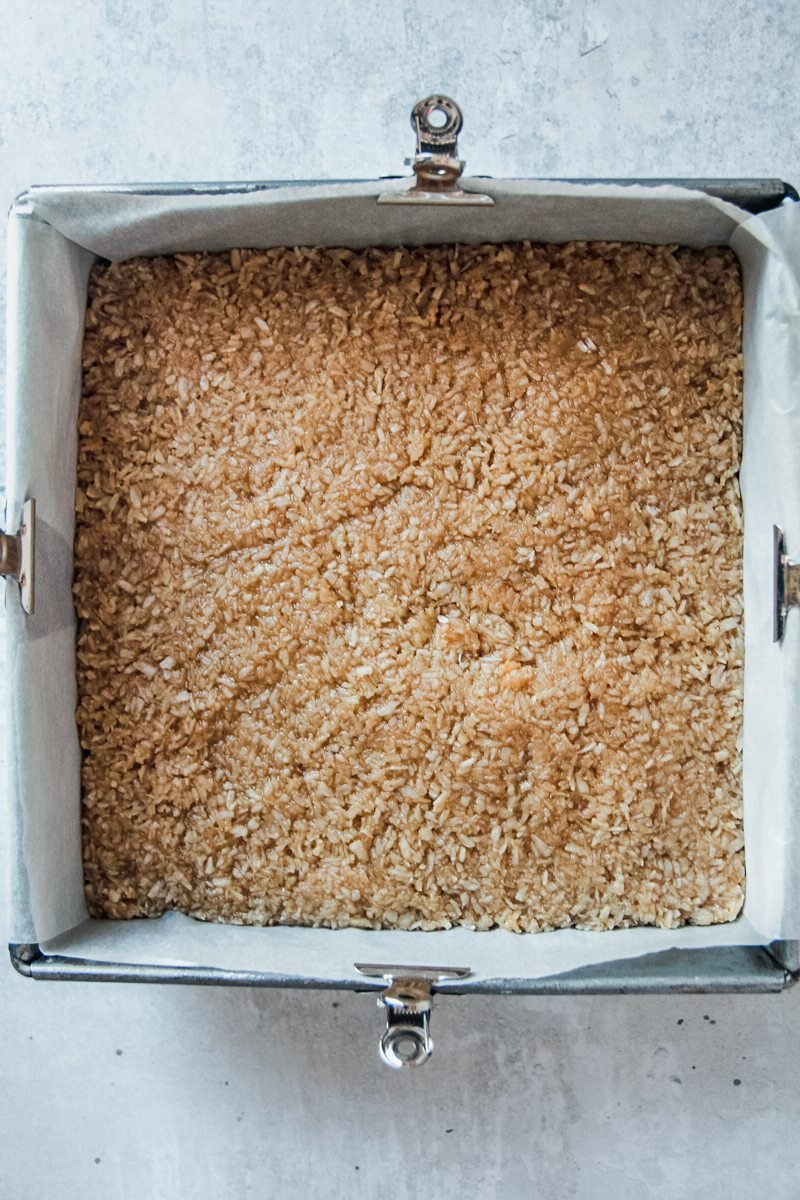
Step 6: Pour into your cake tin: Pour the cake batter into your cake tin and bake until lightly golden and a skewer comes out clean.
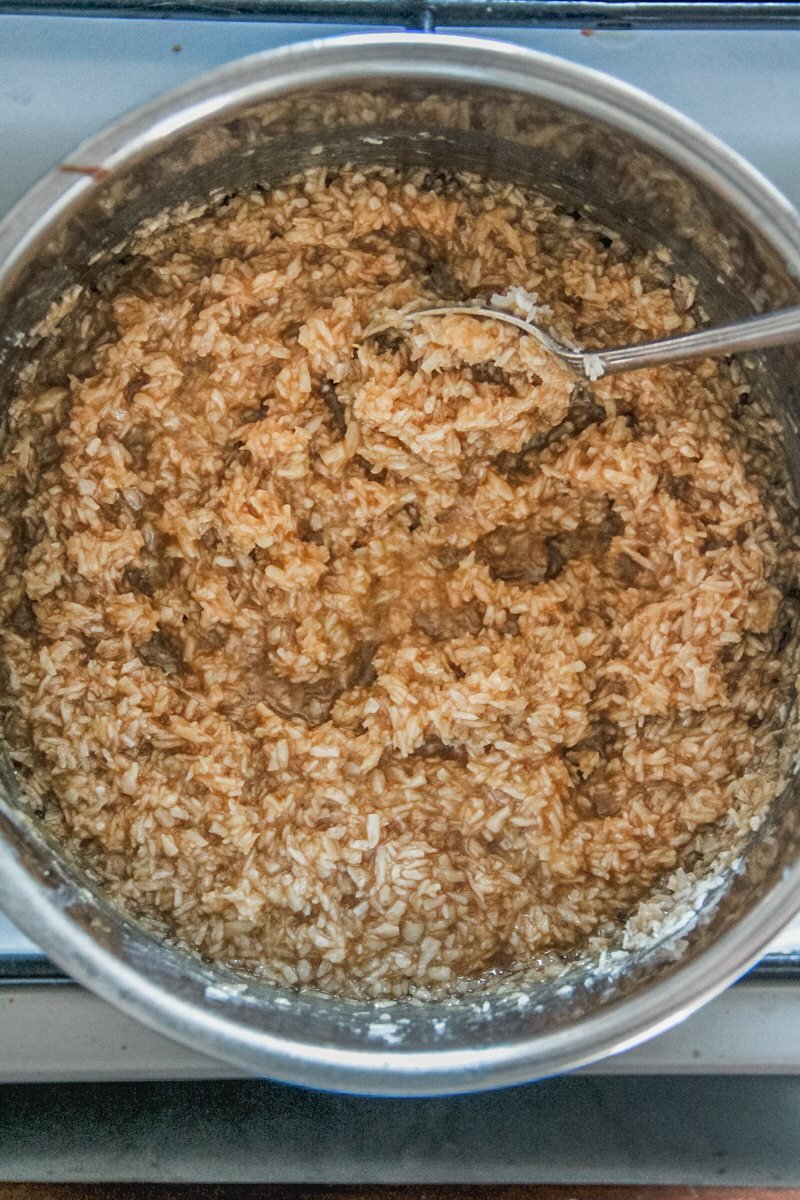
Step 7: Caramelized coconut: Whilst the cake bakes, heat the butter, sugar and milk in a saucepan until it is at a rolling boil, adding the coconut and stirring.
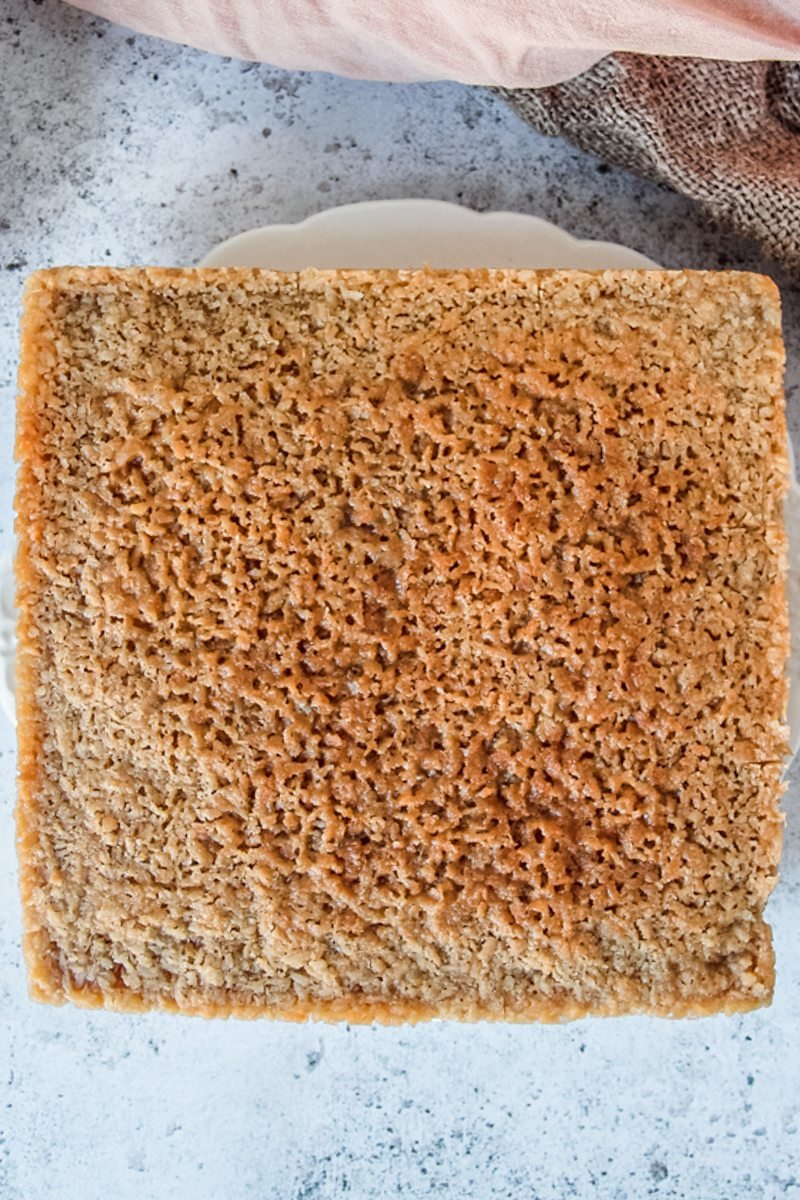
Step 8: Add the coconut topping: Spoon the topping on the cake and smooth out.
Step 9: Bake the cake: Return the cake to the oven until golden.
Step 10: Allow to cool: Give the cake time to cool to room temperature.
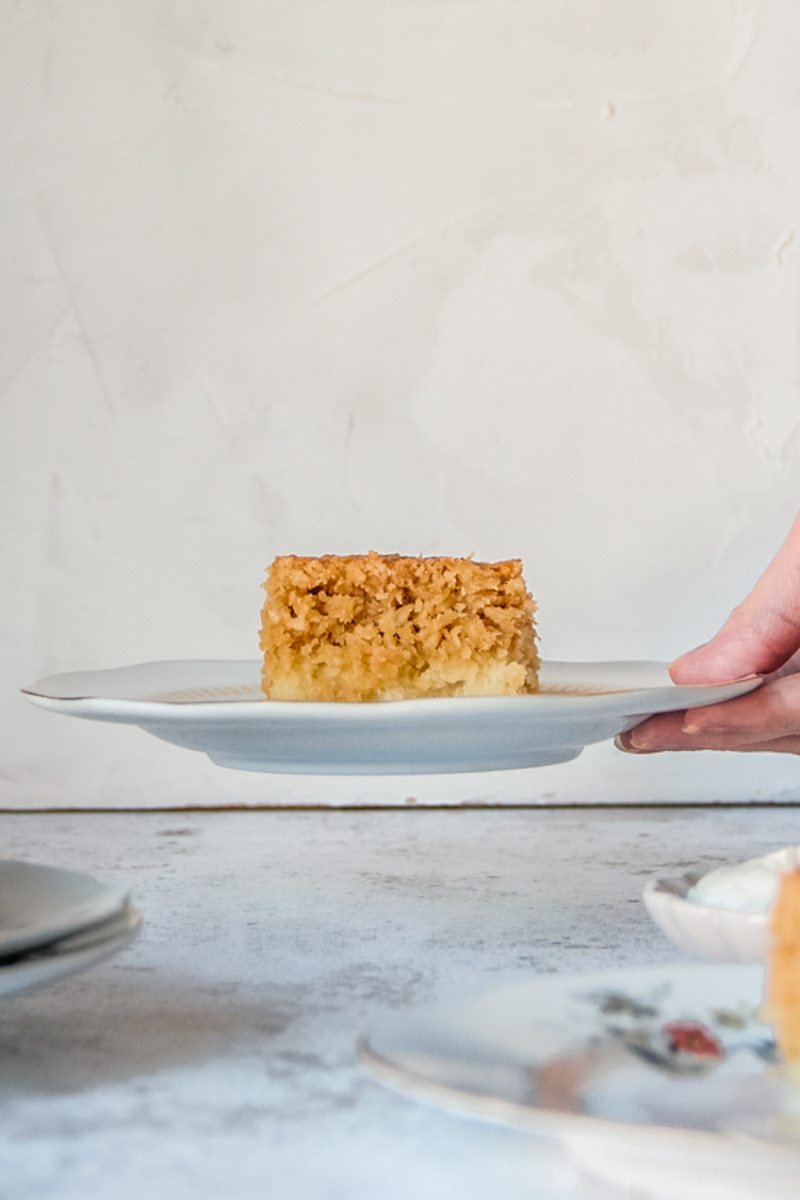
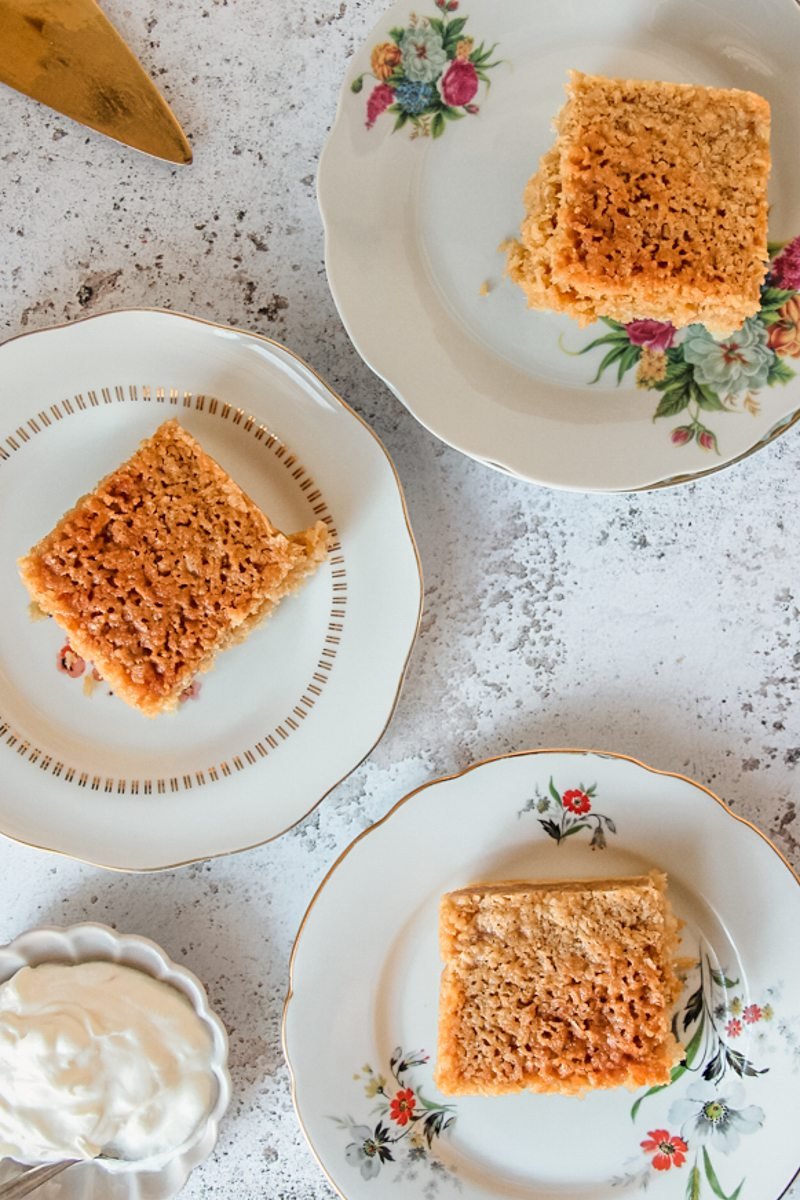
Step 11: Serve: Slice and serve with a little thick yogurt on the side.
Step 12: Enjoy: Dig in!
FAQ's for the best Dream Cake
To achieve the perfect texture for your cake, it's crucial to fold the flour into the whipped egg mixture gently and with care. This helps prevent gluten activation while ensuring a smooth and tender batter. Take your time, fold slowly and methodically, ensuring all pockets of flour are incorporated.
Typically, this Danish dessert is baked in a square or rectangle tin, primarily due to the coconut sugar topping that tends to spill over. However, if you only have a springform tin at your disposal, fret not! Simply place the springform tin on a baking tray before baking to contain any potential drips and maintain a mess-free oven experience while still achieving a perfect cake.
More cakes you'll love

Dream Cake (Drommekage)
Ingredients
Sponge Cake
- 75 grams / 2.6 ounces butter
- 120 grams / ½ cup milk
- 160 grams / 1 cup plain flour
- 4 grams / 1 teaspoon baking powder
- 110 grams / 2 large eggs room temperature
- 100 grams / ½ cup caster/superfine sugar
- 2 teaspoons vanilla bean paste or one vanilla bean seeded
- ¼ teaspoon sea salt
Coconut Topping
- 150 grams / 5.3 ounces butter
- 250 grams / 1 ¼ cups brown sugar
- 60 grams / ¼ cup milk
- 200 grams / 2 ¼ cups shredded or desiccated coconut
Instructions
Sponge Cake
- Greaseproof your cake tin and sprinkle a tablespoon of flour therein, tapping and turning to cover and preheat the oven to 190C/375F.
- Sift the flour and baking powder into a small bowl, add the salt and set aside.
- Place the butter and milk into a saucepan on low heat until the butter is melted, set aside.
- Place the sugar and eggs into a bowl and beat on high speed until light and fluffy, approximately 8 minutes.
- Add in the vanilla seeds and extract beat until just combined.
- Pour half the sifted flour into the whipped eggs and slowly and methodically fold through until the mixture is smooth.
- Add half the milk butter mixture and fold through the cake batter until smooth.
- Repeat with the remaining flour and milk, folding until incorporated and the batter is smooth.
- Pour into your cake tin and bake in the oven until a skewer comes out clean and it’s golden on top, approximately 20 minutes.
- Remove from the oven and increase the heat to 210C/410F.
Coconut Topping
- Meanwhile, for the topping place the butter, sugar and milk in a saucepan on medium high heat, stirring until the sugar has dissolved.
- Turn the heat to high until it is a roiling boil (it will do this if you simply don’t stir for a few minutes), remove from the heat and add the coconut in, stirring to combine.
- Return to the heat for 1 minute to heat through, remove and set aside.
- Take spoonfuls of the coconut syrup and place on top of the cake, smoothing as you go.
- Place in the oven until golden on top, approximately 5 minutes.
- Remove and allow to cool fully.
- Slice and serve with unsweetened yogurt alongside.
- Enjoy!
Video
Notes
- Desiccated coconut: Desiccated coconut is finer and adds a nice texture. You could substitute with shredded coconut, if you prefer.
- Baking powder: This helps our cake rise so to create the nice light crumb and avoid a dense cake. Baking powder can expire, so it's best to check the best before date, particularly if yours has been open for some time.
- Eggs: Room temperature eggs are essential to bind with the butter and sugar, allowing more air to be introduced. This results in our sponge that nice and light texture.
- Folding the flour into the eggs: Pockets of flour will hide between the whipped eggs so fold slowly and methodically to not activate the gluten whilst also ensuring the batter is smooth.
- Type of cake tin: Ordinarily this cake is baked in a square or rectangle tin due to the coconut sugar topping that will run down the sides of a springform tin so if all you have is a springform tin on hand, set it on top of a baking tray to bake.
- Square tin: A 18×18 cm or 7×7 inch square baking tin was used here, though a rectangle or round tin would also work well. Do note that if you use a round baking tin, particularly a springform one, to bake the cake on top of a tray to avoid the caramel mixture dripping into the floor of your oven.
Nutrition
Subscribe to receive a free weekly newsletter using seasonal produce as well as exclusive content!
Made it and loved it?
If you have made this recipe, it would mean so much to leave a review below to help more people find this.

Leave a Reply