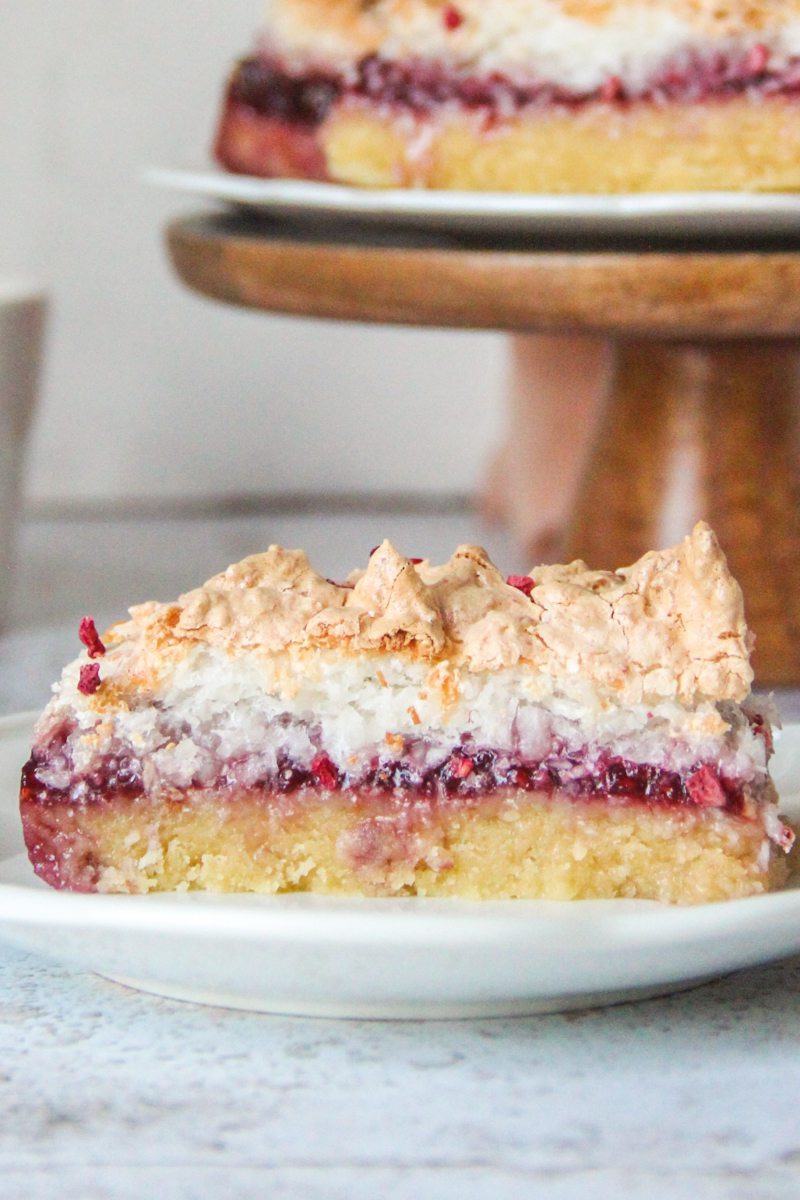
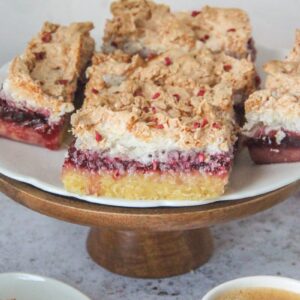
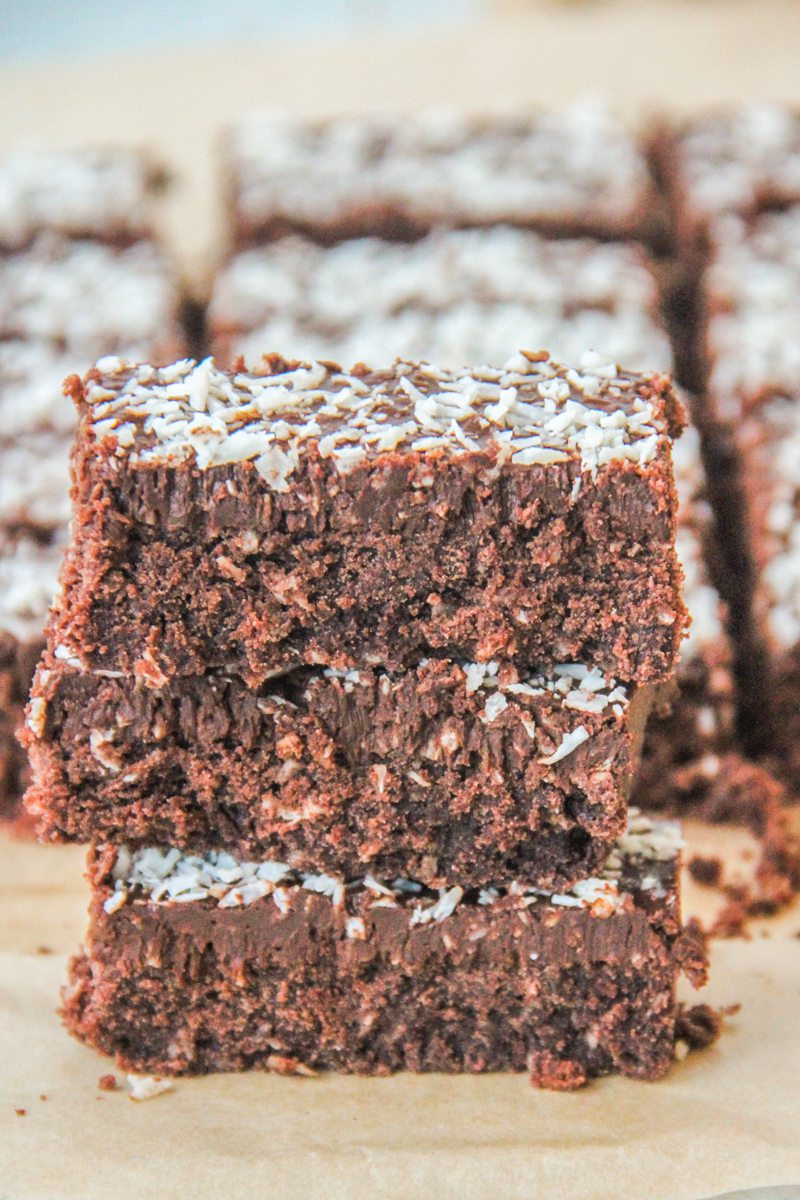
Indulge in this Louise Cake recipe! With delightful combination of buttery shortbread crust, layer of raspberry jam, and a fluffy coconut meringue topping. This classic dessert is sure to impress your loved ones.

Table of Contents
Whether you're in need of a delightful dessert for a special gathering or simply craving a scrumptious treat, our Louise Cake recipe is a must-try! This beloved New Zealand slice comes together effortlessly, making it an ideal choice for both novice and experienced bakers.
History of Louise Cake
Originating in New Zealand, Louise Cake is believed to have been named after Queen Victoria's daughter, Princess Louise of England. This delightful creation showcases the perfect harmony of crumbly shortbread-like base, spread of raspberry jam, and a generous coconut meringue layer. The combination of these distinct elements has made traditional Louise Cake a staple on dessert tables and afternoon tea spreads across the country. Elevate your baking skills and indulge in the sweet nostalgia of Louise Cake - a true Kiwi treasure.
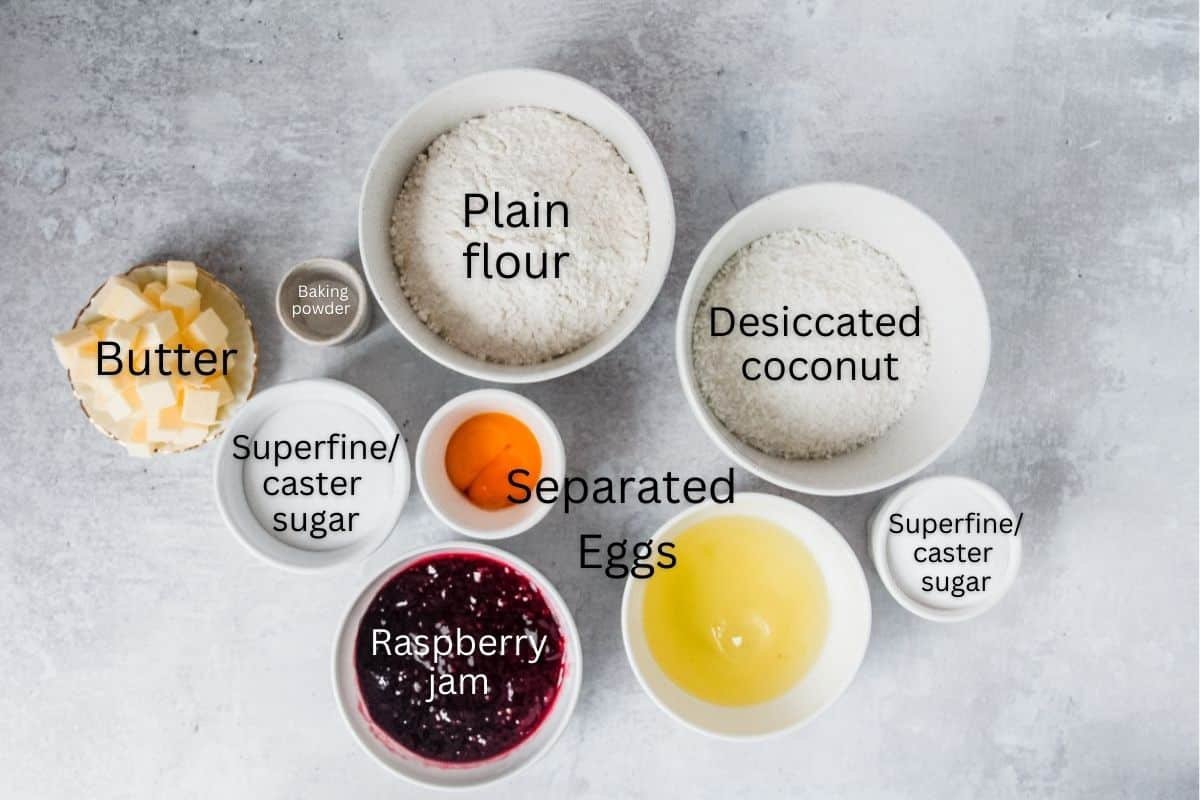
Ingredients and substitutions for Louise Cake
- Butter: Room temperature unsalted butter is used here, though salted butter would also work if that’s what you have on hand. Room temperature is best because it combines with the sugar and other base ingredients best.
- Sugar: Superfine or caster helps dissolve into the butter and meringue during whipping. You could half and half the sugar with light brown sugar and caster sugar, as I do not recommend substituting completely as it would result in a different flavor to the base and meringue.
- Eggs: The egg yolks results in our shortbread base have a lux flavor and softer texture. With those egg whites giving our meringue topping a beautiful lightly crunchy topping.
- Plain flour: Plain or all purpose works best here for a nice shortbread base, however, you could use bread flour in equal measure here if that’s all you have on hand.
- Raspberry jam: No Louise slice recipe is complete without jam, however, some people prefer a plum jam, or even strawberry jam filling so you could substitute in equal measure, if this sounds like a better option.
- Desiccated coconut: The meringue topping isn’t complete without that coconut folded through though it is best in smaller pieces so the result is a meringue with coconut that doesn't overpower our topping. You could substitute in equal measure with shredded coconut or even flaked almonds which would also work well here.
See recipe card for quantities.

How to make Louise Cake:
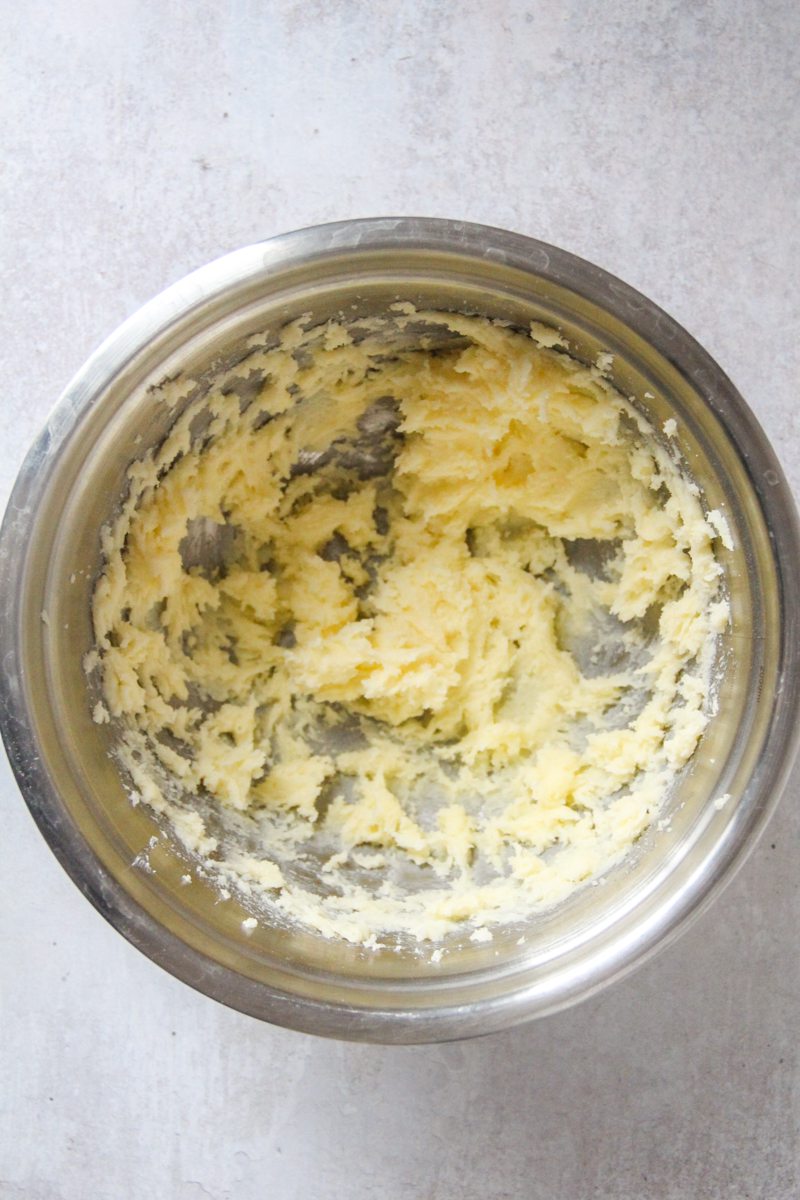
Step 1: Beat: Beat the butter and sugar until light and fluffy.

Step 2: Yolk it: Add the yolks and beat until well combined.

Step 3: Dries: Add the dry ingredients and combine until the mixture is crumbly, tossing into your tin and pressing down evenly.

Step 4: Smear: Spread the tangy jam over the buttery even base.
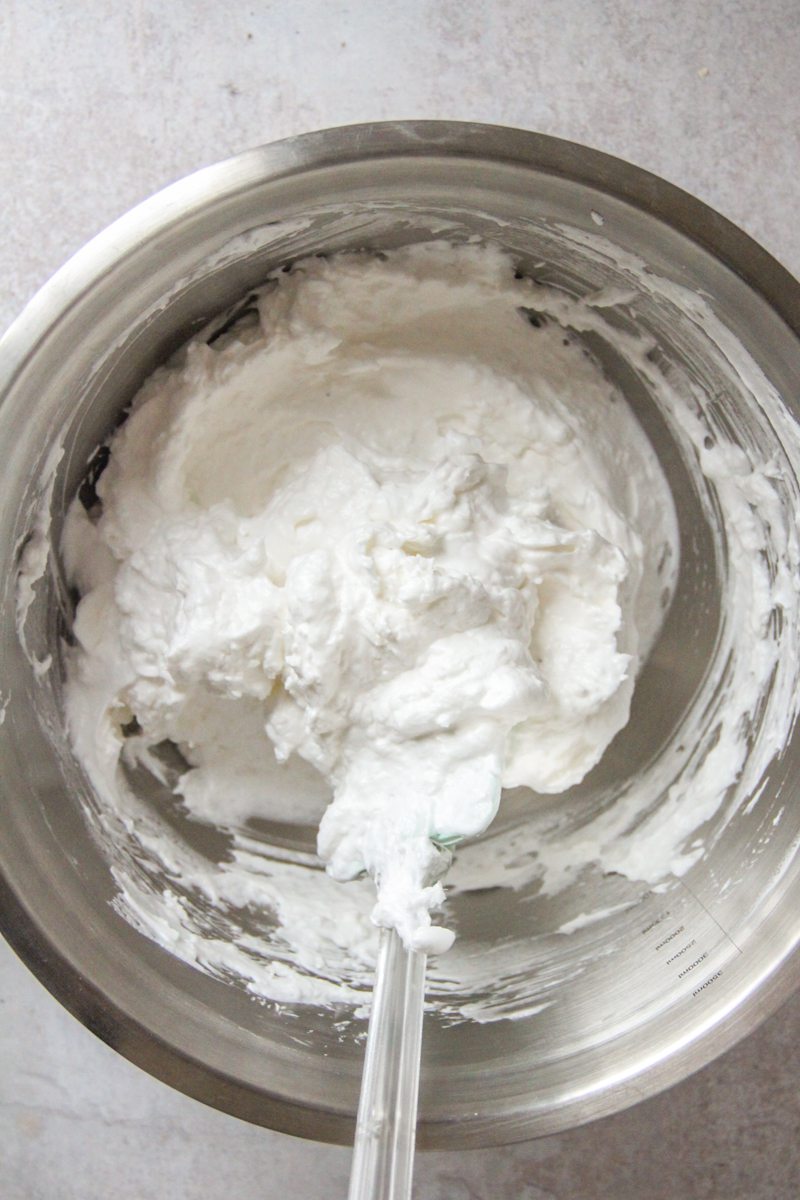
Step 5: Fluffy meringues: Beat the egg whites until soft peaks and begin slowly adding in the sugar until stiff peaks are reached. Toss in the desiccated coconut and stir.
Step 6: Spoon: Spoon the meringue on top of the jam unevenly, pushing to the edges of your tin and fluffing into a rough waves shape.
Step 7: Bake: Bake until lightly golden.
Step 8: Cool and slice: Remove from the oven and allow to cool fully before cutting into even pieces and serving up.
FAQ's for the best Louise Cake
The best result in a stable but volumized meringue is to whip it at a low, but medium speed (depending on your beaters), this will result in introducing enough air to expand the egg whites without over whipping when you begin to introduce your sugar.
Absolutely! Experiment with different jams or preserves to create unique variations. You can also add other fruits or even a layer of lemon curd for a zesty twist.
It can be stored in an airtight container at room temperature for up to 3-4 days. However, it's best enjoyed within the first couple of days when the flavors and textures are at their peak. If you need to make it ahead of time, refrigerate it to extend its shelf life.
Yes, you can freeze Louise Cake. Wrap individual slices or the entire cake tightly and place it in a freezer-safe container. It can be stored in the freezer for up to 2-3 months. Thaw in the refrigerator before serving.
More New Zealand recipes you’ll love

Louise Cake
Ingredients
Base
- 100 grams / 3.5 ounces butter room temperature
- 100 grams / ½ cup superfine/caster sugar
- 40 grams / 2 large egg yolks room temperature
- 267 grams / 1 ⅔ cups plain flour
- 6 grams / 1 ½ teaspoons baking powder
Filling
- 237 grams / ¾ cup raspberry jam
Meringue topping
- 105 grams / 3 large egg whites room temperature
- 100 grams / ½ cup caster sugar
- 100 grams / 1 cup desiccated coconut
Instructions
Base
- Preheat oven to 160C/320 and line a 18×18 cm or 7×7 inch square baking tin with parchment paper.
- Place the butter and sugar into a bowl and beat on medium until pale and fluffy, approximately 3 minutes.
- Add in the egg yolks and combine until smooth, approximately 1 minute.
- Add your flour and baking powder and beat on the lowest setting until the flour has just been combined and no dry portions remain on the sides of the bowl.
- It will be quite crumbly, but that is what you want!
- Pour the crumbly mixture into your prepared tin and press firmly into your baking tin base until even. Set aside.
Filling
- Spoon the raspberry jam over the base and spread out evenly. Set aside.
Meringue topping
- Place egg whites in a clean and dry bowl and beat on medium until soft peaks form.
- Add in 1 tablespoon of the sugar and beat until well combined, approximately 45 seconds.
- Repeat by adding 1 tablespoon sugar and combine until fully incorporated and the meringue begins to look slightly glossy and are stiff.
- Toss in the coconut and fold into the meringues until well combined.
- Spoon the meringue mixture on top of the cake and make small peaks in the mixture.
- Place in the oven to bake for 30 minutes or until lightly golden on top, covering the meringue with foil, if necessary to ensure it doesn’t brown too much.
- Remove and allow to cool in the baking tin.
- Lightly press the edges of the meringue to pull away from the edges of the tin.
- Once cool completely, pull the slice out of the tin and slice evenly.
- Serve and dig in!
Video
Notes
- Whip your egg whites at medium speed: The best result in a stable but volumized meringue is to whip it at a low, but medium speed (depending on your beaters), this will result in introducing enough air to expand the egg whites without over whipping when you begin to introduce your sugar.
- Offset spatula: A small spatula helps smooth out shortbread style base and the jam filling.
- Baking tin: A 18x18 cm or 7x7 inch square cake pan works well here, though a rectangle or round tin would also work well.
- Feel free to customize this: Experiment with different jams such as plum or strawberry or preserves to create unique variations. You can also add other fruits or even a layer of lemon curd for a zesty twist.
- You can freeze it: Wrap individual slices or the entire cake tightly and place it in a freezer-safe container. It can be stored in the freezer for up to 2-3 months. Thaw in the refrigerator before serving.
Nutrition
Subscribe to receive a free weekly newsletter using seasonal produce as well as exclusive content!
Made it and loved it?
If you have made this recipe, it would mean so much to leave a review below to help more people find this.
Sarah
Is this an 8 inch or 9 inch square tray?
Thanks
Sylvie Taylor
Hi Sarah,
It's a 7x7 square tray, though an 8x8 would work too (the base would be less thick as something to note). Do let me know how you get on.
Thanks,
Saskia
I don't love a shortbread base and discovered this had more cake-like texture in the base. The raspberry jam and meringue on top of that base made this disappear quicker than anticipated. Thanks
Sylvie Taylor
Thanks so much for your feedback Saskia. Love hearing how much you enjoyed these!
Saskia
Love how the base isn't a crumbly shortbread so this feels more like a cake which I baked in a round tin to serve at a family gathering. Needless to say everyone was raving and it disappeared quickly!
Sylvie Taylor
Great idea to bake this as layer cake and wonderful to hear that everyone enjoyed these!
Riley
Found this recipe on YouTube and have wanted to make Louise Cake for sometime and now regret not making this sooner!
Sylvie Taylor
So glad you enjoyed this recipe as much as we do!